In Utah, the there is a chain of thrift stores called Deseret Industries. Locally, the stores are referred to as "the DI". I grew up having only been in the store a few times, and I always felt really uncomfortable with the smells and people and condition of the merchandise. Over the last seven years, I have grown to use the DI on a regular basis, and love shopping there! I love most any thrift store. Furniture and accessories at thrift stores always spark my creativity. And this creativity is what keeps me going back.
 |
| 6thstreetdesignschool.blogspot.com, Shop Local - Savers |
I'm not the only one who makes the DI apart of my shopping. Every DI, every morning (except Sundays when they are closed), at around 9:55am, a crowd has gathered at the front doors.
 |
Deseret Industries January 25, 2011, 9:58am |
This crowd yesterday had a few guys who, as I found out by the time I had gotten my two year old out of the car and carried him into the book section, were ready with smart phones to scan the latest books for a quick internet sale profit. I also know that there are several retail stores in Utah that survive off of buying furniture from the thrift stores, painting it, and then charging twice as much. These stores are run by extremely creative and hard working people and I have no problem buying items from them either. They have already done the work for me by hunting the stuff down at the thrift stores.
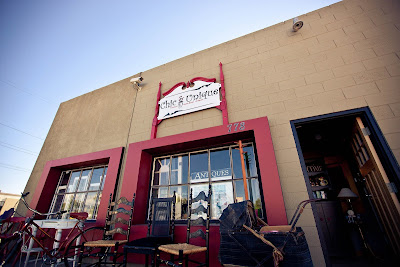 |
| thevintagemixer.com, My Dough Girl, fresh baked cookies in Salt Lake City, Chic and Unique storefront |
Here is how I make thrift store shopping work for me:
1. Have measurements of things you are looking for with you. I have stopped buying things that look like they might work when I don't know if they are too small/big/short etc, even when they are super cheap.
 |
| svdpstl.org, thrift stores |
2. Keep a mental file of the type of things you find at each thrift store. Just yesterday I noticed that the corner hutch at a local re-do store was asking $90 for has a twin at the DI for $50, granted the glass shelves were missing in the thrift store hutch. This way, when you think, "I really COULD use an entertainment armoire downstairs." You will remember that the thrift store in this certain neighborhood always has a few of them.
 |
| sewingmesewingyou.com, 'Thrift Stores' in the UK? |
3. If you are determined to find a certain thing within the next few days, be prepared to go to several thrift stores in one expedition. The first thrift store most certainly won't have exactly what you need, but keep going until you find the item. You'll be armed with a wealth of information from the other stores (like prices and condition of items) once you find what you're looking for. This gives you more appreciation for the item when you get it home.
 |
| AZhumane.org, Thrift Stores |
4. Most trips to the thrift store should be approached with extreme flexibility. As my mom says about her favorite after market retailer, "We never find what we want, but we always find something fun." Don't be shy about picking things up, inspecting things, picking things up to move them out of the way in order to see what else is on the shelf. And don't be discouraged if you end up walking out with nothing you had hoped to find. You might want to set a limit on how much you are going to spend. I have re-donated the books, frames, and other items that I buy at thrift stores. It's like a nice revolving door, as a friend has remarked. But don't be too wasteful. This usually isn't a problem with thrift store beginners.
 |
| americanwaythriftstore.com |
5. Visit Eddie Ross's website for inspiration. He has made the design industry followers much more keen on the idea of second hand shopping.

eddieross.com, Shopping the Salvation Army
6. Brush up on the history of what you are looking for. Eddie is great at knowing the brands and time periods of the pieces he buys. This could be something that you do afterwards. I have no problem buying something that I love in the store, I know will work for my needs, and then when I get home do the research to place even more value on the purchase.
 |
| eddieross.com, Shopping the Salvation Army |
7. Have a large vehicle either with you or available for same day pick up. If you find the perfect pedestal kitchen table, you are going to need to cart that base and table top home on your own, probably within that business day. Most stores have a couple of strong people in the back to help you load the furniture into your car.
.jpg) |
| examiner.com, Best Tips to Shop Thrift in South Florida |
8. If something doesn't have a price tag, find something similar that does have a price tag and take that to the cashier for reference. You can haggle a bit at the cashier's counter, depending on the store.
 |
| thevintagebazaar.com, Weekend Guide: Baraboo, Wisconsin |